Grafana Public Access Setup

Grafana Public Access Setup

To setup login for anonymous users you need to make these small configuration changes in the default.ini/grafana.ini file (Grafana\conf). If you want to hide the login page do this configuration:[auth] # Set to true to disable (hide) the login form, useful if you use OAuth #disable_login_form = false disable_login_form = true Change disable_login_form to true. Enable anonymous access:[auth.anonymous] # enable anonymous access enabled = true Specify the organization:# specify organization name that should be used for unauthenticated users org_name = YOUR_ORG_NAME_HERE Restart Grafana…


Read More Read More

Netdata Custom Dashboard V2

Netdata Custom Dashboard V2

To see this in action visit http://45.79.41.79:8087/statistics/ Putting this HTML code here for reference as an example of how you can use multiple servers In the config file edit the line : Near the top within <script> </script>NETDATA.options.current.stop_updates_when_focus_is_lost = false; I was to lazy to edit the config files and re-upload

Get system metrics for 5 min with Docker, Telegraf, Influxdb and Grafana

Get system metrics for 5 min with Docker, Telegraf, Influxdb and Grafana

Original Source: https://towardsdatascience.com/get-system-metrics-for-5-min-with-docker-telegraf-influxdb-and-grafana-97cfd957f0ac Hi all, there is a very quick guide how to configure a system monitoring for one or more servers using a modern stack of technologies, like Grafana, Docker and Telegraf with Influxdb. The main goal for this article is to show how to start getting system metrics from your servers quick and easy, without spending lot of time for configuring big and complicated monitoring systems. Especially if you only need to take care for few Web servers…

Read More Read More

OPNSense with Zerotier Setup – Network Bridge

OPNSense with Zerotier Setup – Network Bridge

Below are the steps required to get Zerotier setup on your OPNsense router to act as a network bridge between your Localnetwork and Clients with Zerotier client installed on remote networks. In ZT network screen: Managed routes: An IP assigned to the ZT network for the range selected e.g. 10.10.10.0/24. For the device the service runs on (OpnSense) there is a destination for 192.168.1.1/24 to LAN of the ZT network IP range you’ve set e.g. 10.10.10.22. Auth Activated for OpnSense…

Read More Read More

Manjaro Gnome Screen Sharing

Manjaro Gnome Screen Sharing

Step 1: Enable Remote Access to Ubuntu Ubuntu machines by default have the protocol and server installed already. To enable remote access, logon to the desktop computer and go to System Menu ==> System Settings… as shown in the image below… When system settings page opens, go to Sharing ==> Enable sharing by sliding the button to the right… When sharing is enable, click the Screen Sharing option on the page and turn on Screen Sharing  as shown in the image below… When you’re done,…

Read More Read More

Auto open website on Raspberry Pi startup

Auto open website on Raspberry Pi startup

I would like to credit Brian Haines with the provided information below.You can view the original content on his site followinghttps://brianhaines.com/2019/01/08/auto-open-website-on-raspberry-pi-startup/ Thanks for letting me keep a copy Brian! Visit him at https://brianhaines.com/ There are a number of resources on the Web for this, but most are outdated or take the process further than I wanted. To be clear, I don’t want to disable the Pi’s desktop or block the user from using Chrome. I just want the Pi to…

Read More Read More

Complete Unraid Monitoring

Complete Unraid Monitoring

Copying from various sources. Links at bottom of page. I have for some time shared my Unraid System dashboard over at Grafana.com but never really had the time to make a quick write up on how to set it all up. So this will try to do just that. This guide will make it so you will be able to monitor cpu usage, cpu temps, network stats, ram usage and much more by simply importing a dashboard. How it works In getting…

Read More Read More

Unraid SteamCacheBundle

Unraid SteamCacheBundle

Install Head to Community Applications. Search for and install SteamCacheBundle. Next set a fixed IP address. Enter this in the box marked, Fixed IP address. Make sure it’s not an IP already in use on your network. Now enter the same IP address for the LANCACHE_IP variable Make sure the Data and Logs directories are set to your liking. The Data directory is where all the cache data will be stored. Now change the CACHE_MEM_SIZE, CACHE_DISK_SIZE and CACHE_MAX_AGE if you wish. The are fairly self explanatory and…

Read More Read More

Unraid NGINX proxy manager, unifi controller

Unraid NGINX proxy manager, unifi controller

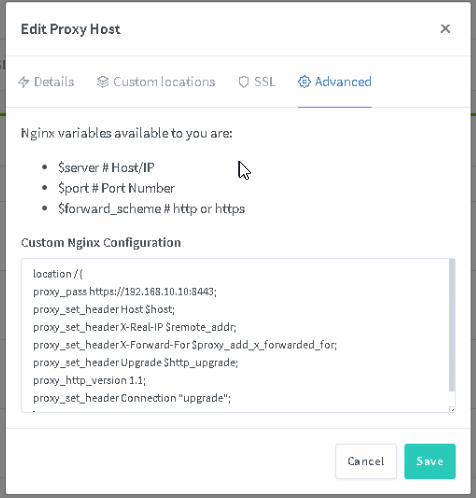
If you are using NGINX Proxy Manager and are trying to proxy a unifi controller the code exists below location / {proxy_pass https://127.0.0.1:8443;proxy_set_header Host $host;proxy_set_header X-Real-IP $remote_addr;proxy_set_header X-Forward-For $proxy_add_x_forwarded_for;proxy_set_header Upgrade $http_upgrade;proxy_http_version 1.1;proxy_set_header Connection “upgrade”;} Where to apply this code? Go to the advanced tab and post the code above. Make sure to fill in your IP information. Originally found on reddit

Netdata Custom Dashboard

Netdata Custom Dashboard

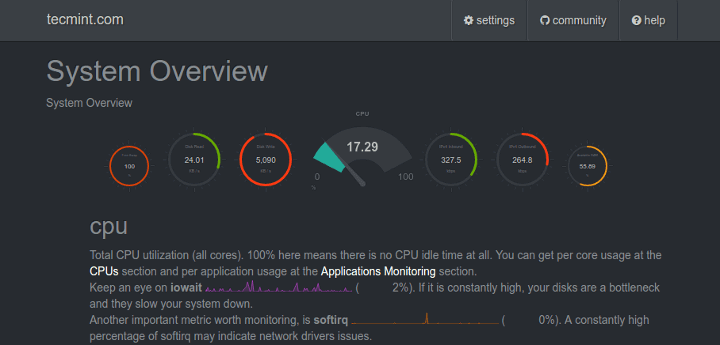
Just posting this will come back to edit Netdata custom dashboards Posted on October 16, 2019 by Spencer LeB Link to Existing dataNetdata Custom Dashboards You can: create your own dashboards using simple HTML (no javascript is required for basic dashboards) utilizing any or all of the available chart libraries, on the same dashboard using data from one or more netdata servers, on the same dashboard host your dashboard HTML page on any web server, anywhere netdata charts can also be added to…

Read More Read More

Mount Samba share on Ubuntu and Debian

Mount Samba share on Ubuntu and Debian

These steps will help you to mount remote samba shared directory to your system. Follow the step by step guide for the mounting of remote samba share on Ubuntu and Debian system. Also enables to automount shared drive even after system reboot. Step 1 – You need to install package cifs-utils on your system. Run the following command on the terminal for the installation. sudo apt-get install cifs-utils Step 2 – After that create a directory to mount the share drive. sudo mkdir /media/Share…

Read More Read More

Use systemd to Start a Linux Service at Boot

Use systemd to Start a Linux Service at Boot

What is systemd?Permalink systemd is a Linux system tool initially developed by the Red Hat Linux team. It includes many features, including a bootstrapping system used to start and manage system processes. It is currently the default initialization system on most Linux distributions. Many commonly used software tools, such as SSH and Apache, ship with a systemd service. It is simple to create a custom systemd service that will run any script or process you choose. Although there are several…

Read More Read More

SETTING UP SAMBA SHARING SERVER ON ARCH LINUX

SETTING UP SAMBA SHARING SERVER ON ARCH LINUX

Original https://lampjs.wordpress.com/2018/08/10/setting-up-samba-sharing-server-on-arch-linux/ Samba facilitates file and printer sharing among Linux and Windows systems. To share contents of linux server there should be a sharing server running, mostly Samba is used as sharing server on linux machines. Follow the steps below to install Samba on PC where you need to share files. Install Samba 1 # pacman -S samba Create configuration file for Samba, it is required but not automatically created when installing samba so have to manually create it. 1 #…

Read More Read More

Raspberry Pi 5250 Terminal Emulator

Raspberry Pi 5250 Terminal Emulator

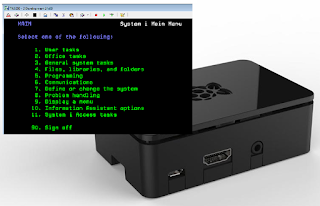
The Raspberry Pi 3b kit, from various kit providers, costs around $50 including case, heat sinks and power supply. Add a 8GB microSDHC card for less than $10 and you’ve got the makings of an inexpensive (sub $60) 5250 terminal. There are two basic methods we’ve used with good success to create a 5250 terminal from a Raspberry Pi. First, if you have an IBM-i with active SWMA and are running IBM-i 7.x, then the new IBM-i Access Client Solution…

Read More Read More

Example: Ubuntu Setting up an alias for the – sudo apt-get install – command

Example: Ubuntu Setting up an alias for the – sudo apt-get install – command

If you do a lot of installations on your system and wish to avoid using the entire sudo apt-get install command, you can create a short alias for it using the following method: Through the file manager, open the .bashrc file located in your home folder. This file is usually a hidden file so you will need to use the Ctrl+H control to view all the hidden files located in the folder. You can use your favorite text editor through the command line or UI to…

Read More Read More

WordPress on Docker, with phpMyAdmin, SSL (via Traefik) and automatic updates

WordPress on Docker, with phpMyAdmin, SSL (via Traefik) and automatic updates

This was a very helpful for me to understanding trying to reverse engineer to make my own. Original link is below. Tried my best to COPY/PASTE the HTML code cutting out certain bits. This is for me to reference. Docker, a powerful and standardized way to deploy applications Free SSL certificates from Let’s Encrypt (via Traefik) phpMyAdmin to easily manage your databases Automatic container updates (via Watchtower) If you’ve got your own server already — whether at Bytemark or not…

Read More Read More

How to Configure Virtual Host on Windows 10 XAMPP

How to Configure Virtual Host on Windows 10 XAMPP

Create the Virtual Host First, you need to navigate to C:/xampp/apache/conf/extra or wherever your XAMPP files are located. Then, edit httpd-vhosts.conf with any text editor. In my case, I am using Notepad++. The file looks something like this: Delete everything in the file and paste the following code: <VirtualHost *:80> DocumentRoot “c:/xampp/htdocs/WordPress” ServerName WordPress.localhost <Directory “c:/xampp/htdocs/WordPress”> </Directory> </VirtualHost> In the above code: VirtualHost: Most web servers use port 80 as their default port. However, you can change the port to 8080, 8081 etc. DocumentRoot: The folder where…

Read More Read More

Setup SoftEther VPN on Ubuntu into Google Cloud Platform

Setup SoftEther VPN on Ubuntu into Google Cloud Platform

VPN doesn’t need much intro in this age but a basic definition is: A virtual private network (VPN) extends a private network across a public network, and enables users to send and receive data across shared or public networks as if their computing devices were directly connected to the private network. Meaning you can browse privately without prying eyes on connected public/private network. Or by pass GEO restrictions. In this tutorial, we will be using Google Cloud Platform (GCP) trial account…

Read More Read More

How to Install Jitsi Meet on Ubuntu 18.04 LTS

How to Install Jitsi Meet on Ubuntu 18.04 LTS

Jitsi Meet is a free and open source video conferencing service solution that is packed with various premium features, such as superior sound quality, excellent encryption and privacy, and universal multi-platform availability. With the help of Jitsi Meet, you can easily setup a stunning video conferencing service of your own. In this tutorial, I will guide you through the process of establishing a video conferencing service on an Ubuntu 18.04 LTS server instance using Jitsi Meet. Prerequisites A fresh Vultr…

Read More Read More

Unifi Captive Portal For Guests

Unifi Captive Portal For Guests

If you want to provide your guests with free and easy internet access, setting up a Unifi Captive Portal might be a good idea. While you just can create an extra wireless network (SSID) with a simple password, you also need to keep the security of your network in mind. You don’t want to give your guests access to your systems. By using the Unifi Guest Portal you can isolate the clients on your network and give them access for…

Read More Read More